Surface
The Surface tab does not edit palette colours. It builds a mask that limits shadow strength, and textures to assign on the material.
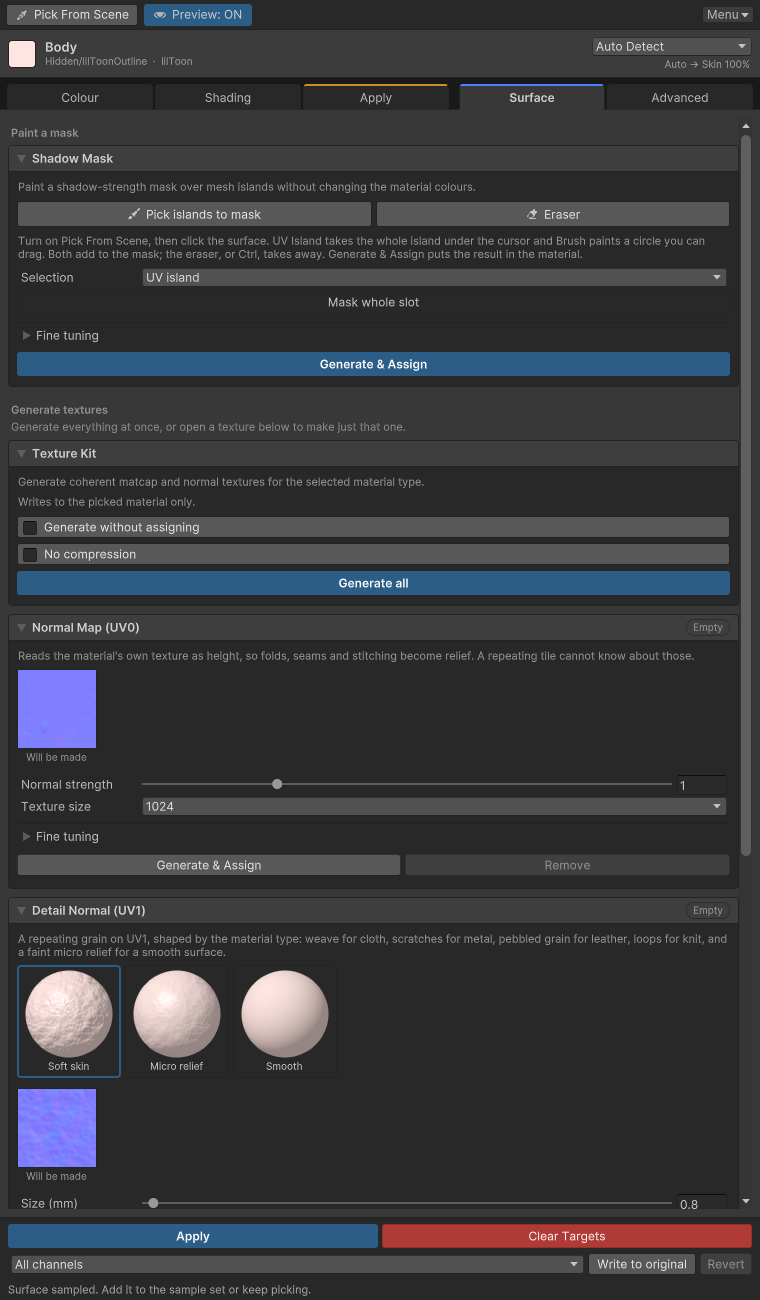
Shadow mask
Paint a mask on eye whites, teeth, and inset surfaces that should not catch the toon shadow. The mask does not change the material colour. It only reduces shadow strength.
- Turn on Pick islands to mask.
- Choose a mode under Selection.
- UV island takes the whole connected UV island under the click.
- Brush takes triangles around the click. Size is Brush radius (px). You can drag to paint.
- The default adds to the mask. To remove, turn on Eraser or hold Ctrl while clicking.
- Soften (px) sets how far the edge is expanded and blurred.
- Click Generate & Assign.
The file is named <material name> ShadowMask.png. The size follows the base texture, or 2048 when there is no base texture.
If a mask is already there, choose under If a mask exists. Merge adds this selection to the existing mask. Overwrite drops the existing cutouts and keeps only this selection. Keep leaves the existing mask and writes nothing.
Texture Kit
The Texture Kit builds a normal, a detail normal, a matcap, an AO Map, and a Lighting Ramp for the material type. Generate all creates the normal, detail normal, and matcap this shader accepts and assigns them. It does not include the AO Map or the Lighting Ramp; bake those separately with Bake AO Map and Bake Lighting Ramp in their own groups. The normal, detail normal, and matcap one at a time are Generate & Assign on that row.
| Texture | What it does |
|---|---|
| Normal Map (UV0) | Adds surface direction. It can also be built from folds painted in the material's own texture. |
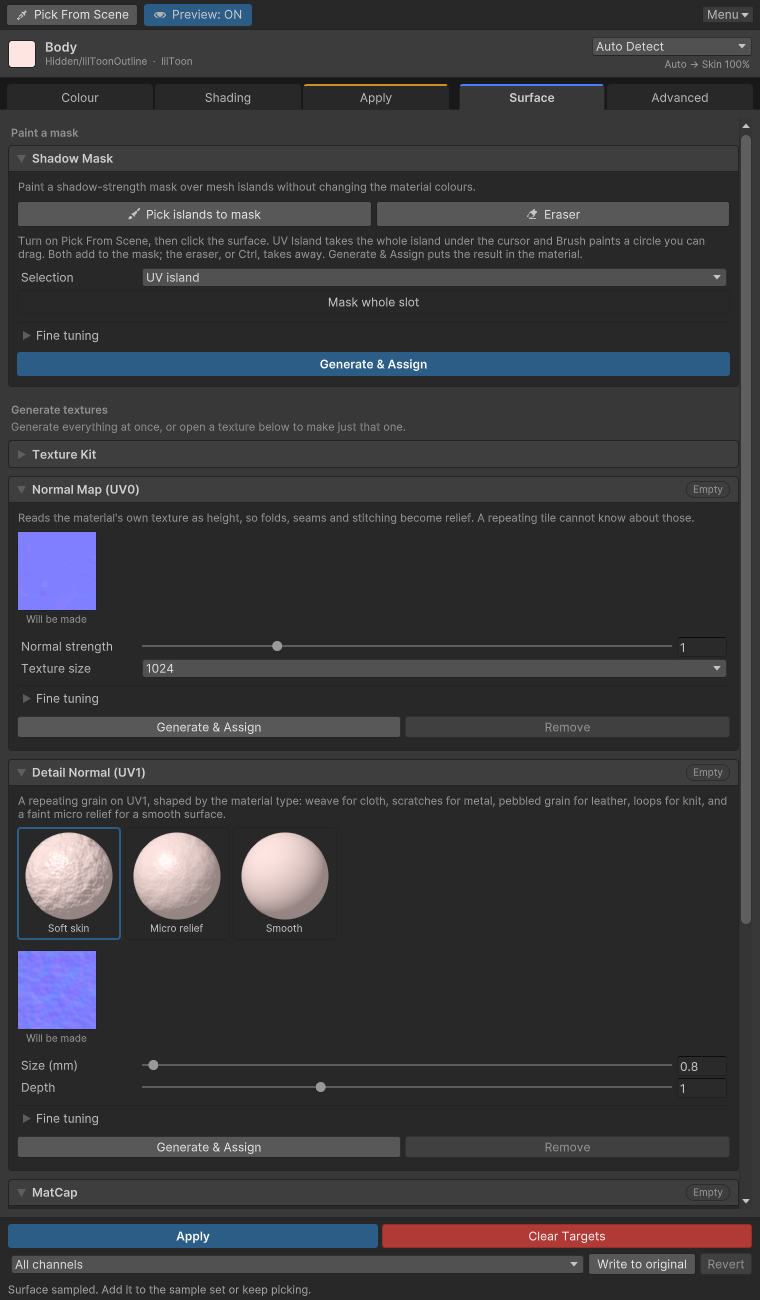
| Detail Normal (UV1) | Lays a repeating grain on UV1. You choose it from the cards: Plain weave, Twill, Satin weave, Knit stitches, Rib knit, Pile fibres, Quilting, Fine pleats, Sequins, Leather grain, Scratches, Wood grain, Stone grain, Soft skin, Micro relief, or Smooth (no grain). The ones that suit the material type come first. |
| MatCap | Gloss that moves with the view angle. You choose it from the cards: Soft sheen, Skin sheen, Hair sheen, Satin sheen, Glossy, Anime gloss, Sharp highlight, Edge glow, Pearl tint, Metal reflection, or None. The ones that suit the material type come first. While Set all colours and numeric values automatically is on, Apply already assigns the gloss you chose, so you do not need to build it here. |
| Hair highlight | Appears for hair on Poiyomi only. It turns on an anisotropic band running across the strands and writes a strand texture that varies it a little per strand. Strand direction is the way the strands run in the mesh's UV map. |
| Glitter | Appears for fabrics, Stockings, Latex, Vinyl, Plastic, Nails, Painted Metal, Gemstone and Pearlescent materials. It turns on the shader's own glitter in the highlight colour and holds it still. Spacing (mm) is how far apart the sparkles sit. lilToon Lite has no glitter. |
| AO Map | Darkens covered places. The row appears only on shaders that have that slot. Baking one avatar body at the default settings takes a little over 10 seconds. |
| Lighting Ramp | Bakes the Colour tab's lit-to-shadow colours into a texture. |
Style cards
Above the Detail Normal and matcap rows are picture cards. Each card is a small sphere in the sampled colour wearing that style, and every card is drawn under the same light. The first card is the material type's default, the next ones are alternatives that suit it, and the last is None (MatCap) or Smooth (Detail Normal). Clicking a card switches to that style, and Generate & Assign builds it. The chosen style, size and depth are recorded in the generated texture, so they are still there when you reopen the window.
Fur, Suede, Velvet, Emissive, Eye and Teeth materials do not recommend a matcap, so they have no matcap cards.
Size and depth
The Detail Normal has Size (mm) and Depth. Size (mm) is how large one thread, stitch or grain is on the surface. The tiling is set by comparing the mesh's UV1 with its real size, so the grain looks the same size on a densely and a sparsely unwrapped mesh. Depth multiplies the relief the material type recommends; 1 keeps the recommendation. Smoother materials recommend shallower relief. Resolution and repeat cells are under Fine tuning.
Models without UV1
The Detail Normal repeats over UV1. Many avatar models have no UV1, and then the detail normal does not show at all. When the mesh has no UV1, Generate & Assign asks first; Generate UV1 turns on Generate Lightmap UVs in the model's import settings and reimports it. The setting stays on while any material on that model still draws a detail normal made this way, and goes back off when the last one is removed or reverted, also after the window was closed; undo and redo follow it. A detail normal that is refused because the slot holds your own texture does not touch the model. If the detail normal also goes to a material that no avatar in the open scenes uses, the setting is left on for good, because that material may sit on the same model; it changes nothing you can see. If you cancel, the model is left alone and the status line says why the detail normal will not show. A mesh that is not an imported model, such as an NDMF preview mesh, cannot get UV1, and the status line says so.
A texture the shader does not accept gets no row. For example, Poiyomi 11.0 PBR lighting and lilToon with Shadow Mask Type set to Flat or SDF do not read the shadow mask as strength, so there is no Shadow Mask row. On lilToon Lite only the matcap row appears.
With several targets, the Texture Kit does not skip targets detected as a different type. It builds every texture with the picked material's type.
Each slot's chip reads Assigned or Empty. A texture you already placed is not replaced until Replace existing is on. A confirmation comes first.
Generate & Assign and Remove are undoable. Remove restores the slot saved before the generated texture was assigned, or clears the slot. To write the file and leave the material slot alone, turn on Generate without assigning.
On Normal Map (UV0), Normal strength and Texture size sit on the row itself. Smoothing, Detail radius, and Invert, the values you rarely need, sit under Fine tuning below them.